Making Merry with Janome – Reversible Gift Tags
Things are starting to feel festive around here. Some holiday shopping has been done and we are just starting to pull out decorations to make our home more festive for the season.

I haven’t been sewing since the wild rush of preparing for Quilt Market back in October and started to feel the itch to get back to it last week. A quick project is always a good way to begin and so I was thrilled to be asked to participate in Making Merry with Janome, a fun daily sewing project inspiration blog hop to help get all of you wonderful sewers in the mood to create a little holiday magic of your own.
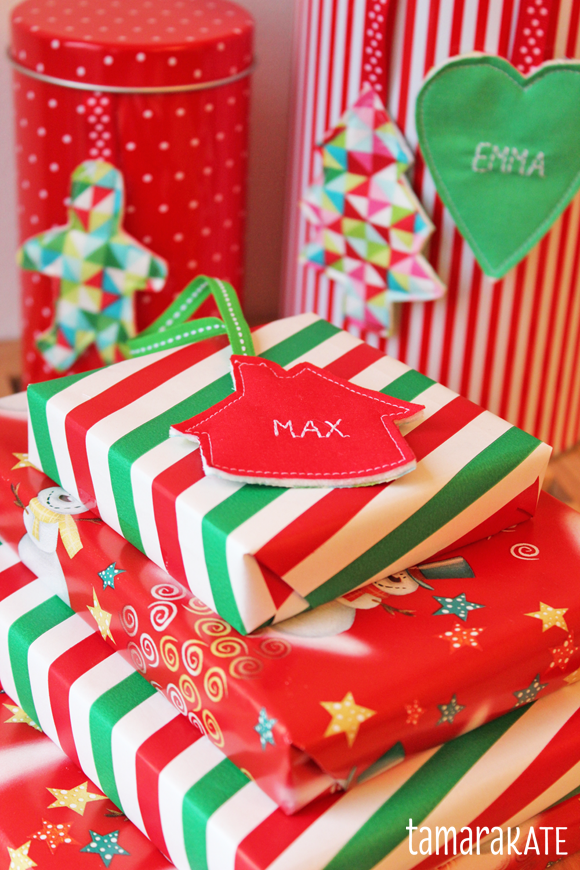
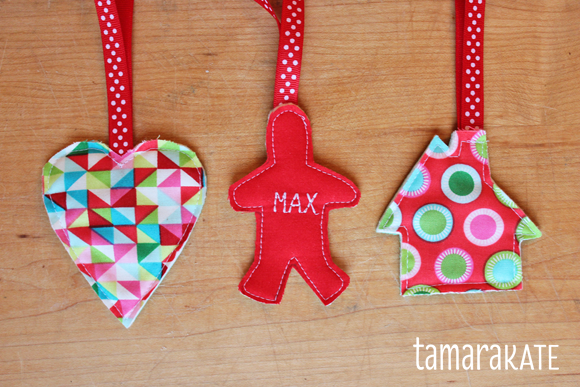
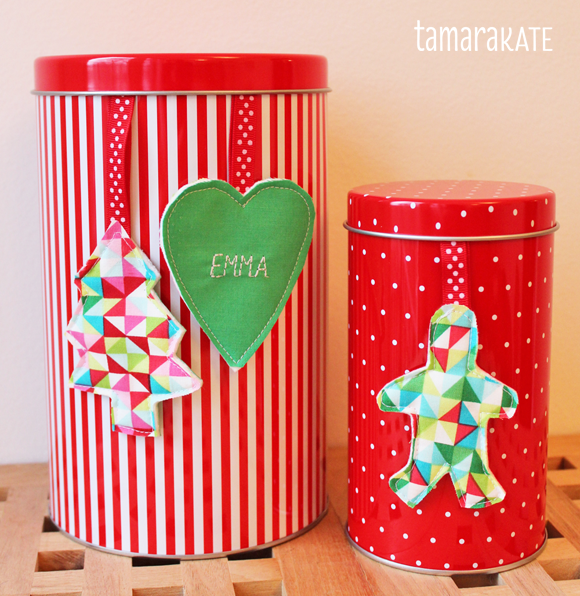
Here are some fun reversible gift tags I whipped up for kids’ gifts. After gift-opening, they can be reused as personalized Christmas ornaments (oh, how they love personalized ornaments) for years to come.
Should you wish to create some yourself, here is a quick guide:
What I used
– solid coloured fabric (I used Cotton Couture)
– co-ordinating patterned fabrics (I used scraps of Festive Forest)
– iron-on interfacing (something mid-weight will work well)
– cookie cutters for shapes
– scraps of quilt batting
– co-ordinating ribbon
– fabric pen; thread (the colour of which will contrast well with your solid fabric), scissors
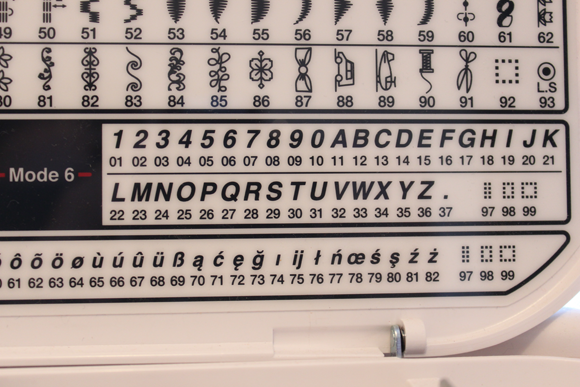
– a sewing machine that has embroidered letter options or embroidery thread and needle to do it by hand

What I did
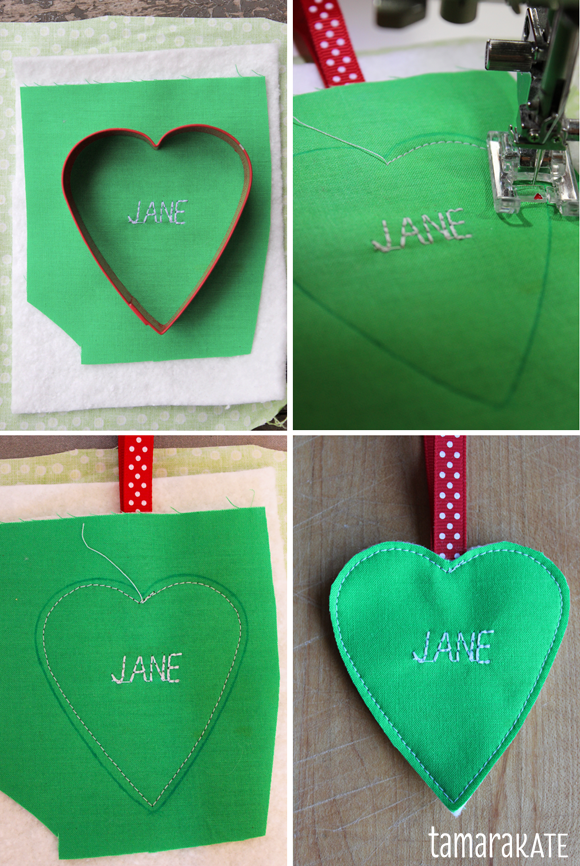
Iron interfacing to one side of the solid fabric. This will make the embroidery much smoother and help avoid fabric puckering.
Embroider the desired name approx. 3″ from sides of fabric (I found it easier to work with a larger piece of fabric and then cut it down after embroidering to ensure the name would be centred). Below are a bit of the embroidery options I am lucky enough to have at my disposal on the Janome MC8200.
Place the cookie cutter on the fabric, centre name and trace around the outside of the shape with a fabric pen. Cut a basic square or rectangle around the traced shape, with about an extra inch of fabric all around. Cut a piece of batting and of patterned fabric, all roughly the same size. Sandwich the batting between the 2 fabric layers with right sides of both fabrics facing out.
Cut a 10″ length of ribbon. Place the two ribbon ends inside the sandwich at the top of the shape, inserting the ends about a half inch. Pin or hold in place.
With a small straight stitch, sew all the way around the shape about 1/8″ inside the drawn line, anchoring the ribbon in the process.
Cut through the 3 layers all the way around on the drawn line, being careful to not cut the ribbon.
And that’s it!

Thanks for stopping by and Happy Sewing!


6 Comments
Liz THompson
December 8, 2015What a brilliant idea to use cookie cutters for shapes for sewing! I had never thought of that. Have used cups & glasses from my kitchen but not cookie cutters. Thanks for sharing – only goes to show that you learn something new everyday if you keep your eyes & ears open!
Tamara
December 8, 2015Thanks Liz! And they make centring embroidered or printed motifs within a shape extra easy-peasy too!
Brooke
December 8, 2015adorable!
Tamara
December 8, 2015Thanks Brooke! Glad you like them.
Sherri | Thread Riding Hood
December 9, 2015These are so cute Tamara! What a great idea 🙂 Love it!
Tamara
December 9, 2015Thanks so much Sherri!