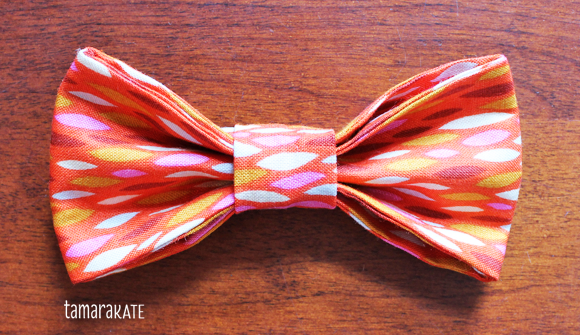
{ Happy Sewing } Easy Bow Tie
Remember these? My lovely cousin-in-law, Julie asked for a tutorial to make a bow tie for her sweet little boy and I was surprised that I had never posted one back when I made all of those with Les Monsieurs. So here you go, Julie & anyone else who would like an easy and quick how-to on these dashing boys’ accessories.
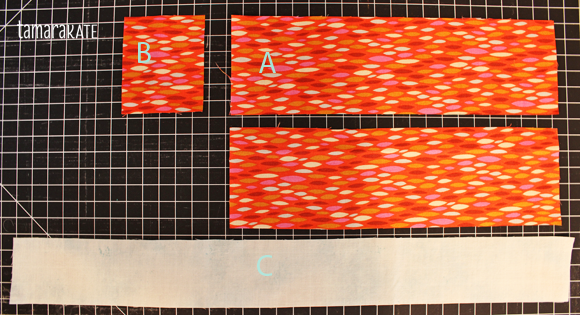
What I used:
– A 2 pieces fabric 10″ wide x 3″ high (I used Helen Dardik’s “Leaves” from her “Too Muchery” collection)
– B 1 piece fabric 2.5″ wide x 3″ high
– C 1 piece fabric 17″ wide x 2″ high (This is for the neckband that will tuck under shirt collars. I opt to keep this light & neutral in colour so that it’s not too noticeable if junior starts fidgeting with his attire. And the great thing is you can make just one band and multiple bows, then just switch out the bow depending on the outfit.)
– D 1 piece lightweight interfacing 9.5″ x 2.5″
– E 1 piece interfacing 16.5″ x 1.5″
– 4″ x 1/2″ velcro (if you can’t find the right width, you can always cut down a wider piece). I choose ease when it comes to kids’ dressing. Velcro means they can do it up themselves with no fuss and no fiddling with hooks and fussy hardware.
What I did:
All seams are 1/4″.
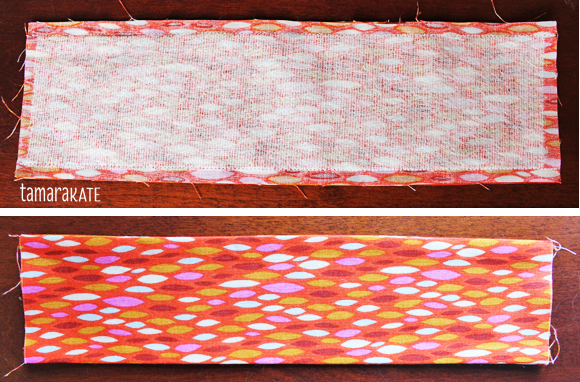
Iron interfacing D onto wrong side of one piece of fabric A (centred). With right sides together, sew together the two A pieces along both long sides. Turn right side out and press.
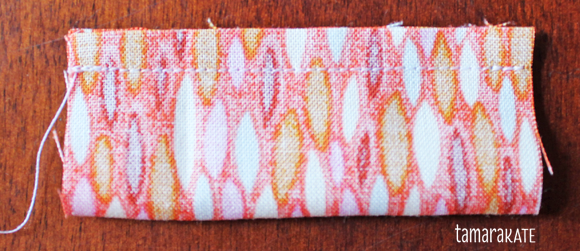
Fold in half and stitch together along raw edges. You now have a ring of fabric. Turn right side out, so that last seam is to the inside of the ring, centred.

Fold fabric B in half to form a long skinny 3″ long piece. Sew along long edge.
Turn right side out & press so that the seam is in the centre. Fold in half (seam to the outside) and stitch together along raw edges.
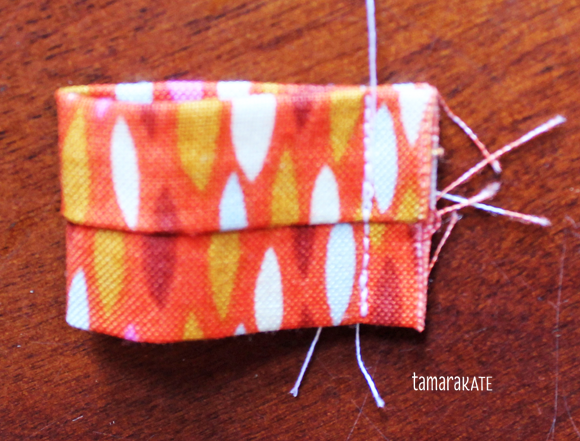
Again, you have a little ring of fabric. Turn right side out, so that last seam is to the inside of the ring, centred.
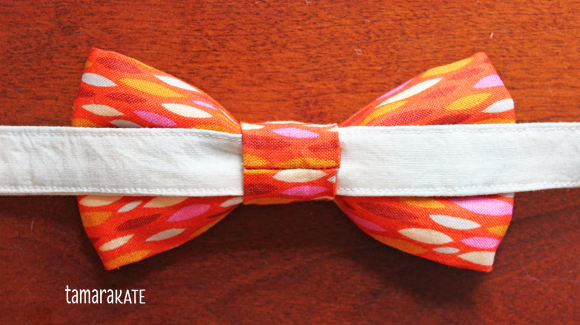
Fold your bow acordian-style to insert it into the centre tie ring and pull half-way through.
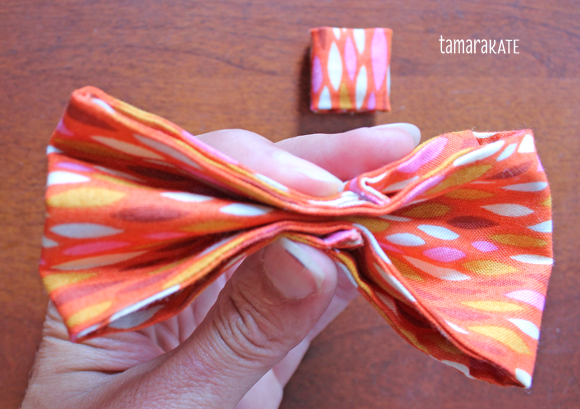
Make sure your seams are both centred at the back (your bow seam should now be hidden inside the centre tie ring.
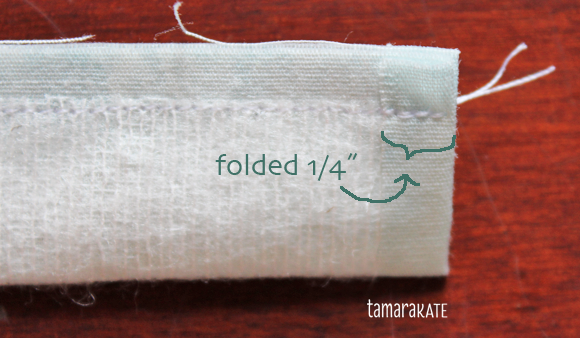
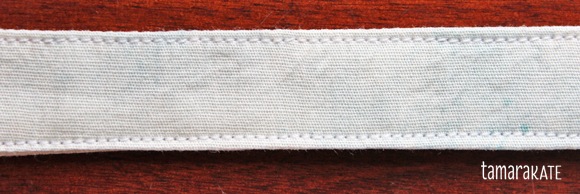
Iron interfacing E onto wrong side of fabric C (centred). Fold 1/4″ toward wrong side at one short end & press. Fold fabric C in half so you have a long very skinny 10″ piece. Sew along the short end that has not been folded & long edge.
Clip corners at stitched end.
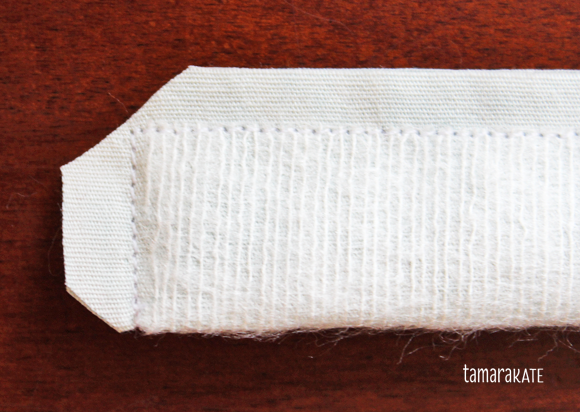
Turn right side out via open end. Topstitch 1/8″ from the edge, all the way around.
Leaving 1/4″ fabric at end, sew one side of the velcro to one end of the neck band (sew all the way around the velcro, backstitching to secure it in place). Cut other piece of velcro into two 1.5″ lengths and discard the third piece. On the opposite side of the band, attach these two pieces as follows: Leave 1/4″ fabric at end, sew down first piece, leave 1.5″ fabric, sew down second piece.
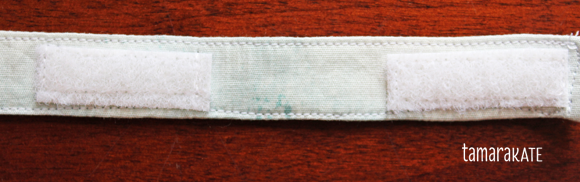
I find this formation cuts down on extra bulk and gives lots of room for adjustments due to heavier shirts, neck growth and all the variations of neck sizes of different little boys.
Insert the neck band into the back of the tie centre ring. Finito!
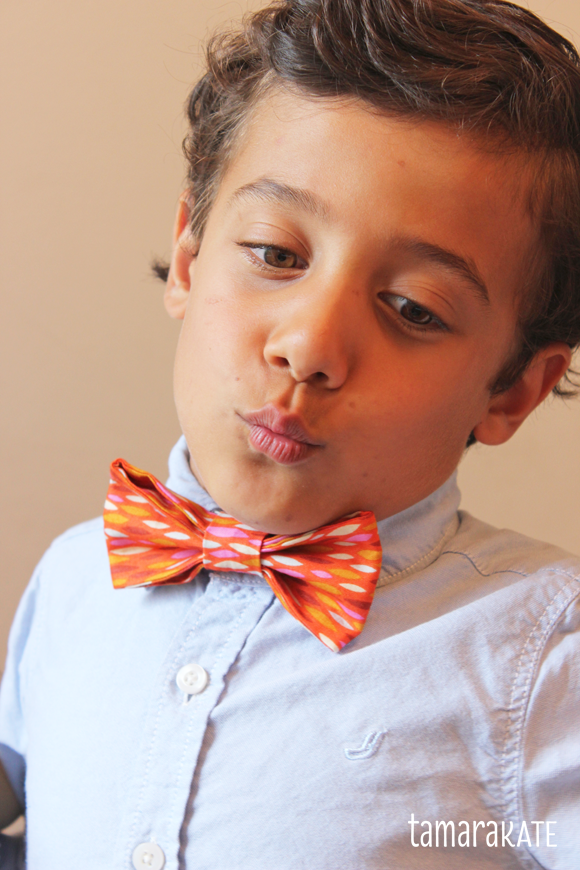
One well dressed, happy boy.


8 Comments
Julie
August 6, 2014Mille merci Tam for this tuto, i’ll try this week end and revert to you very soon…
Mwah !!
Julie
Tamara
August 6, 2014Please let me know if it’s clear to follow. And I want to see pictures!!!
Diana
August 6, 2014Tamara, these are so cute! You tutorials are wonderful, the steps so clearly photographed and descriptions so clear. I also have to tell you, I adore your “Flight Patterns” fabric line. The “Glee” print is likely my favourite print, ever. I have a whack of it, and can’t wait to slice into it and come up with a design that really shows it off. Keep up the great work!!
Tamara
August 6, 2014Thanks so much Diana. I’d love to see what you do with it once you’ve finished. Happy sewing!
Bea Jackson
August 7, 2014Beautiful young man and a really cute bowtie.
Tamara
August 7, 2014Thank you, Bea. That’s my mischievous cutie, Max.
Julie
August 13, 2014Tam, c’est quoi du “interfacing” ?
Tamara
August 13, 2014Hi Julie! Interfacing en francais c’est “entoilage thermocollant”. It comes fusible or stitch on. You should use fusible (iron-on) and attach it to the back of the fabric. Any fabric store should have it, probably in different weights. You just need a light-weight one that will give a little more substance to the bow, so it’s not too floppy.