Machine Embroidered Boy’s Wallet Tutorial
Happy New Year, just a mere almost two weeks late! I hope you all enjoyed festive and relaxing holidays.
It seems like I have been quilting and quilting and quilting lately, and not much else (not necessarily a bad thing). I finished up the latest one on my list last week (more on that next week) and decided I needed a decidedly smaller sewing project that would be quick and fun.
My son has a bit of a fixation lately with carrying his money with him whenever we head out the door to a store. The only problem with that is that he does not have a proper wallet, so uses a coin purse or whatever small bag he can put his hands on at the moment. As his birthday is coming up in a few days, I decided to make him a real big boy wallet.
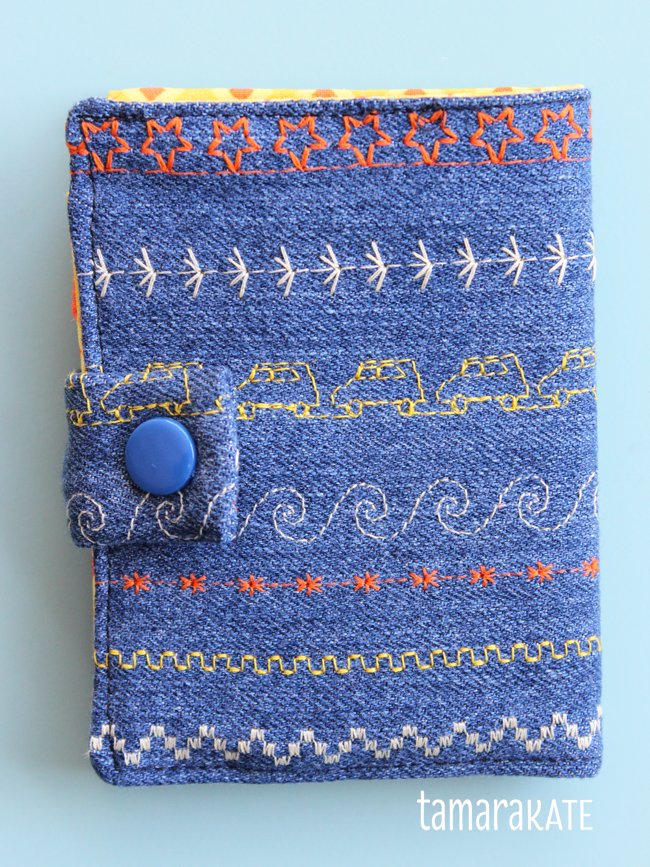
He is fascinated by all the stitch possibilities on the Janome machine I use (MC8200) and frequently asks me to stitch little airplanes or scissors on some scrap of fabric lying around to give to a friend at school, so I thought I’d do a mini embroidery sampler for the main wallet fabric.
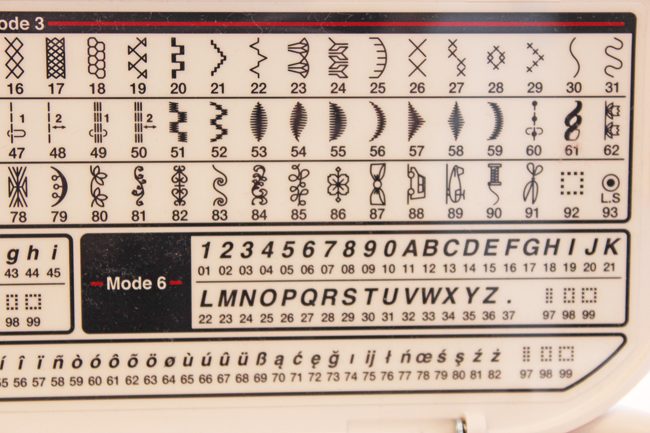
Just a taste of the many stitches available on the MC8200
As this machine is computerized, it’s as simple as pressing a button to choose your stitch and then adjusting the width as desired. I did a practice run of a number of stitches to choose the ones I thought would work best. I cut a rectangle of denim from an old pair of jeans of his that were ripped, penciled 1″ marks along one side edge and started a new line of stitching at each mark. Where there seemed to be a bit too much of a gap (after the waves), I inserted a line of tiny stars.
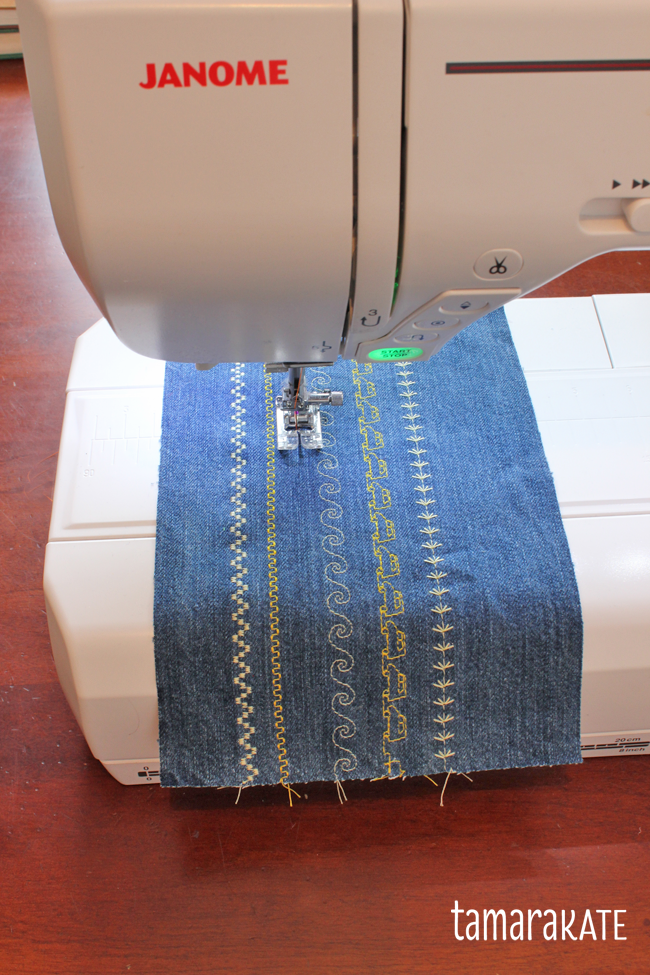
A few lines of orange really makes it pop.

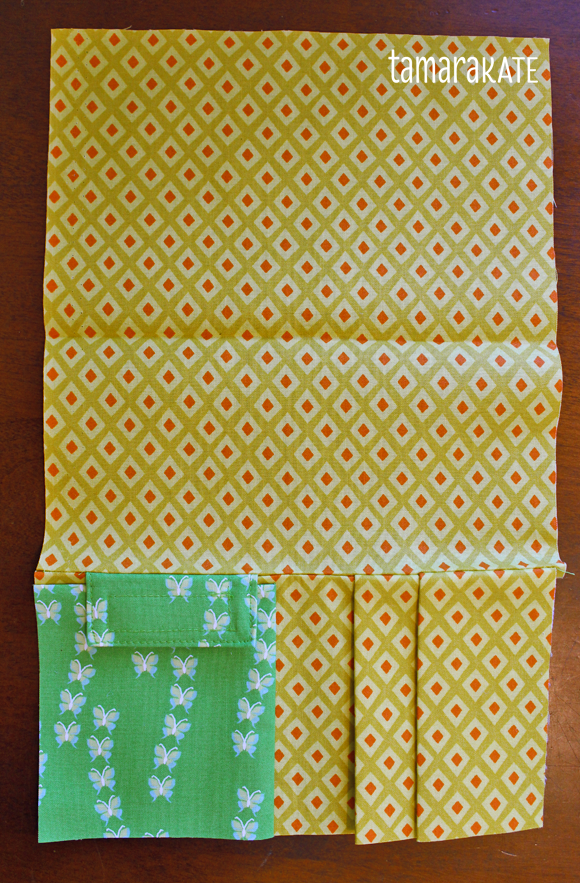
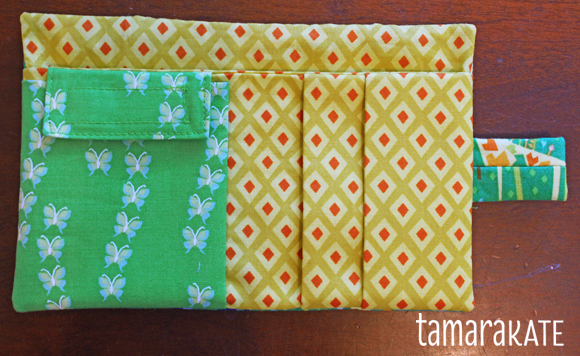
Wanting to make it fun, with colourful compartments for most of what he might need, I made 2 gift card compartments, a velcro-closing change purse and a space for bills (and/or important drawings and notes). Interior fabrics are: Spot in Starfruit (yellow) and Scribble Cars in Clementine.
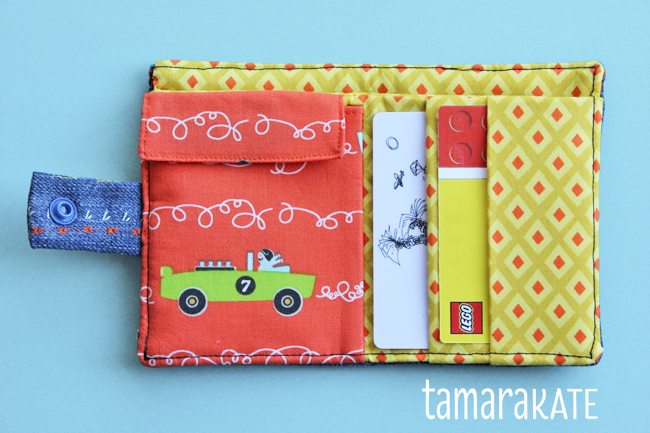
Wanting to make sure there would be no chance of anything sliding out, I positioned the card openings toward the centre fold of the wallet, the velcro on the change purse goes almost the whole width of the purse & the bills are held in by the centre fold.
I worked out all the kinks on this one, then made another to hone the pattern so I could offer you the following tutorial:
What I used:
For all following fabrics, the 1st measurement is the VERTICAL, the 2nd HORIZONTAL.
– A – 1 piece 2½” x 3½” (coin purse flap)
– B – 1 piece 7½” x 4″ (coin purse front)
– C – 1 piece 4½” x 13¾” (card panel)
– D – 1 piece 8½” x 7½” (bill fold)
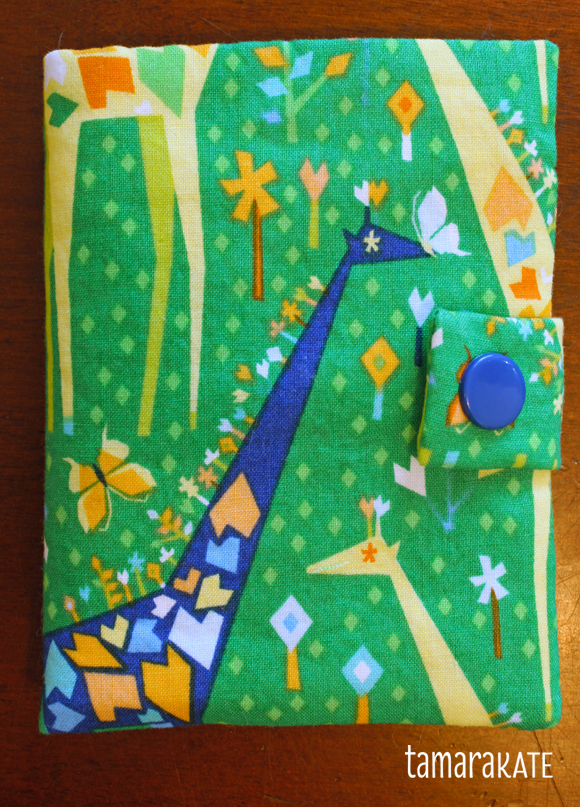
– E – 1 piece 5″ x 7½” (external fabric)
– F – 1 piece 2½” x 2″ (snap tab)
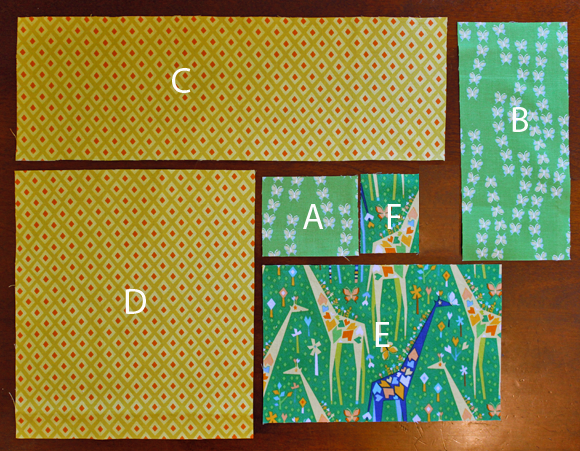
Fabrics: Spot in Starfruit, Crossing Paths in Lime and Stand Tall in Grass.
– Mid-weight iron-on interfacing: Cut the same size of pieces C, E & F.
– 1 piece velcro 2″ x 1/2″
– 1 plastic snap (you will need snap pliers to attach this) OR you could use velcro.
What I did:
All seams are 1/4″.
Iron interfacing to back of C, E & F.
Refer to the following diagram where indicated.
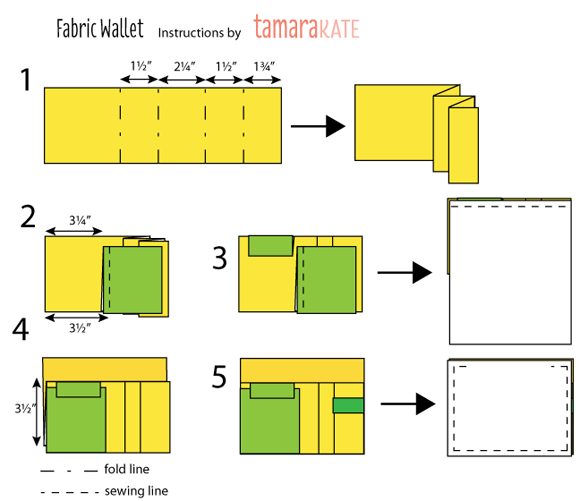
Piece F: Fold in half , right sides together, so that piece measures 1¼” x 2″. Sew along long edge. Move seam to the centre of the tube & press seam open. Sew along 1 short edge. Clip corners & turn right side out. Press & set aside.
Piece A: Fold in half, right sides together, so that piece measures 1¼” x 3½”. Sew along 2 short sides. Clip corners & turn right side out. Top stitch along 2 short edges and folded edge. Securely sew velcro to the underside, centred, 1/4″ above folded edge.
Piece B: Wrong sides together, fold in half so piece measures 3¾” x 4″. Choose a front & a back.
Piece C: Measure and lightly mark along 1 long edge the following, starting at the right edge: 1¾”, 1½”, 2¼”, 1½”. Fold and press accordion style, as in fig 1.
Place piece B on piece C so that front of B is against right side of C, bottom edges align and left edge of B is 3¼” from left edge of C (as in fig 2). Sew 3½” from left edge of piece C. Sew velcro onto front of piece B (only B), 1/2″ from seam line and 1/8″ below fold.
With back of B against C, place A in position at top of B so that velcro lines up. Pin top of A onto C, then move B to the left, out of the way. Place the base of D, right sides together on top of C, aligning top edges. Stitch across top edge (fig 3).
Fold D to back of C along seam. Press flat. Measure down 3½” from seam on D and fold up, right sides together. Press (fig 4). This is the completed wallet interior (WI).
Place F, seam side down on top of WI so that raw edge of F is centred along & aligns with right edge of WI. Place E, right sides together on top of WI. Pin in place.
If available, I suggest using a walking foot to sew this next step: Starting 2″ in from right side at top edge, sew all the way around, stopping 2″ in from left of top edge (fig 5). Clip corners. Turn right side out. Close top opening by hand stitching with an invisible stitch. If desired, top stitch around exterior perimeter.
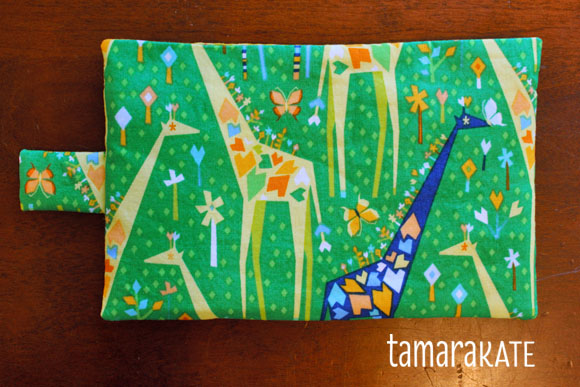
Attach one side of the snap to the snap tab and the other half to the wallet, through to the inside of the bill fold (2 layers of fabric).


4 Comments
Monique
January 14, 2015Tamara this is so super cute. I’m definitely going to make some of these. Thanks for sharing your talents.
Tamara
January 14, 2015Thanks so much Monique! I’d love to see what you create!
Lisa in Port Hope
January 18, 2015I need something like this for my coffee club card and change at work so thank you for this tutorial!
Tamara
January 18, 2015Fantastic Lisa! Glad I could offer something useful to you!